Tracking changes in a word document means to keep a record of the changes made in a document. For example, a student writes a report and gives it to the teacher for checking. Just as a teacher makes corrections using a red pen in a paper copy, the teacher can make changes in a word processor using the Track Changes mode. This will highlight the changes and make it easier for the students to see and correct their mistakes.
How to Start/Stop Tracking Changes in LibreOffice Writer
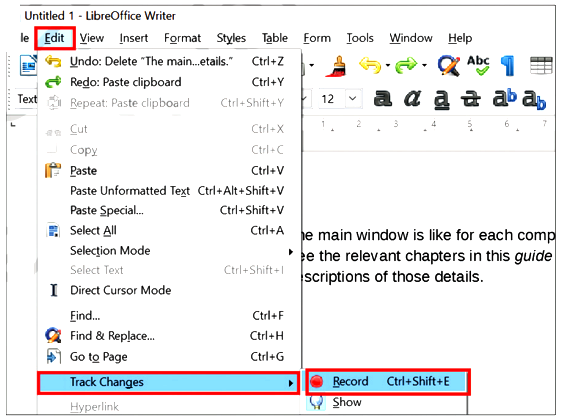
To start tracking changes in LibreOffice Writer, click Edit and then click Track Changes.
This will show a sub-menu with several options. To start tracking changes, the first step is to click Record as shown in Figure, or press Ctrl+Shift+E. Once you click Record, all changes made to the document will be recorded and displayed in a different colour. If you want to stop tracking the changes, click Record again.
Tracking Options
With the Record on, all changes are recorded. These are displayed in a different colour. Any text that is deleted will not disappear, but will appear as strikethrough (or cut across with a line, for example change).
This Track Changes sub-menu provides many options. You can move from one change to the other using the Next and Previous options. When a change is selected you can accept it or reject it using Accept and Reject options. If you accept, the change will become a permanent part of the text and if you reject, it will revert to the original text.
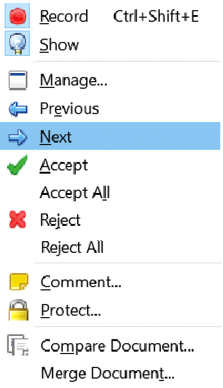
If you think all the changes are OK, then you can accept them all at once using the Accept All command. Similarly, if you do not want to accept any changes and want to revert back to the original text, then you can use the Reject All option.
Sometimes, we may want to see how the document will appear with all the changes accepted without actually accepting them. If you click the Show option, the document will appear as if the changes have been accepted. If you click Show again, the document will appear in track mode with the changes.
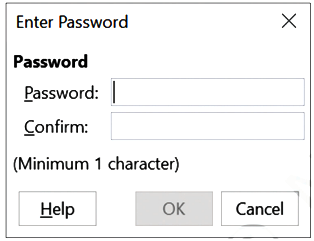
You can protect the changes by adding a password. Click Protect. This will open the Enter Password dialog box as shown in Figure. Add a password. Now only the person who knows this password will be able to accept or reject the changes and no one else.
Enter Password
Manage Option
The Manage option opens the Manage Changes dialog box as shown in Figure. In this all the changes are displayed in a list. You can select a particular change and accept or reject it.
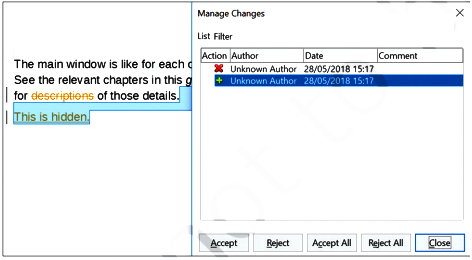
You can also click Accept All to accept all the changes or Reject All to reject all the changes.
Compare Documents
If you click Compare Document…, LibreOffice will compare the current file with the file you provide. This will then open the Manage Changes dialog box with a list of all the differences between the two files. Here you can accept or reject these differences and the current file will get updated accordingly.